Context
This is a great Microsoft announcement for ProDev working with the Power Platform from the beginning like me (oh yes), you can now write code in a Power Platform custom connector! This brand new feature is actually in public preview but you can already try it if you have created a Preview (United States) environment where you have early access to all preview functionalities. In this article, I’ll show you the basic steps to add code in a custom connector so let’s see how to do that together!
Requirements
To add code in a Power Platform custom connector, you have the following requirements:
- Only C# code (.csx or .cs).
- Execution time not higher than 5 seconds.
- Code file size not higher than 1 MB.
Supported namespaces
Only the following C# namespaces are actually supported in a custom connector:
| using System; using System.Collections; using System.Collections.Generic; using System.Diagnostics; using System.IO; using System.IO.Compression; using System.Linq; using System.Net; using System.Net.Http; using System.Net.Http.Headers; using System.Net.Security; using System.Security.Authentication; using System.Security.Cryptography; using System.Text; using System.Text.RegularExpressions; using System.Threading; using System.Threading.Tasks; using System.Web; using System.Xml; using System.Xml.Linq; using System.Drawing; using System.Drawing.Drawing2D; using System.Drawing.Imaging; using Microsoft.Extensions.Logging; using Newtonsoft.Json; using Newtonsoft.Json.Linq; |
Write code in a custom connector
In this article, I’m not covering how to manage security, operations and other tasks related to the creation process of a custom connector. Feel free to check the resources at the end of this article for more details on this topic as there is no change as before.
To write code in a Power Platform custom connector, you need first to create a new custom connector in your target environment using Power Apps or Power Automate web application in Microsoft 365 as below:

After giving a name to your new custom connector, you’ll see that a brand new section “4. Code” is now available in the creation steps:

In this new section, you can paste your code directly in the web browser or upload a code file of your choice:
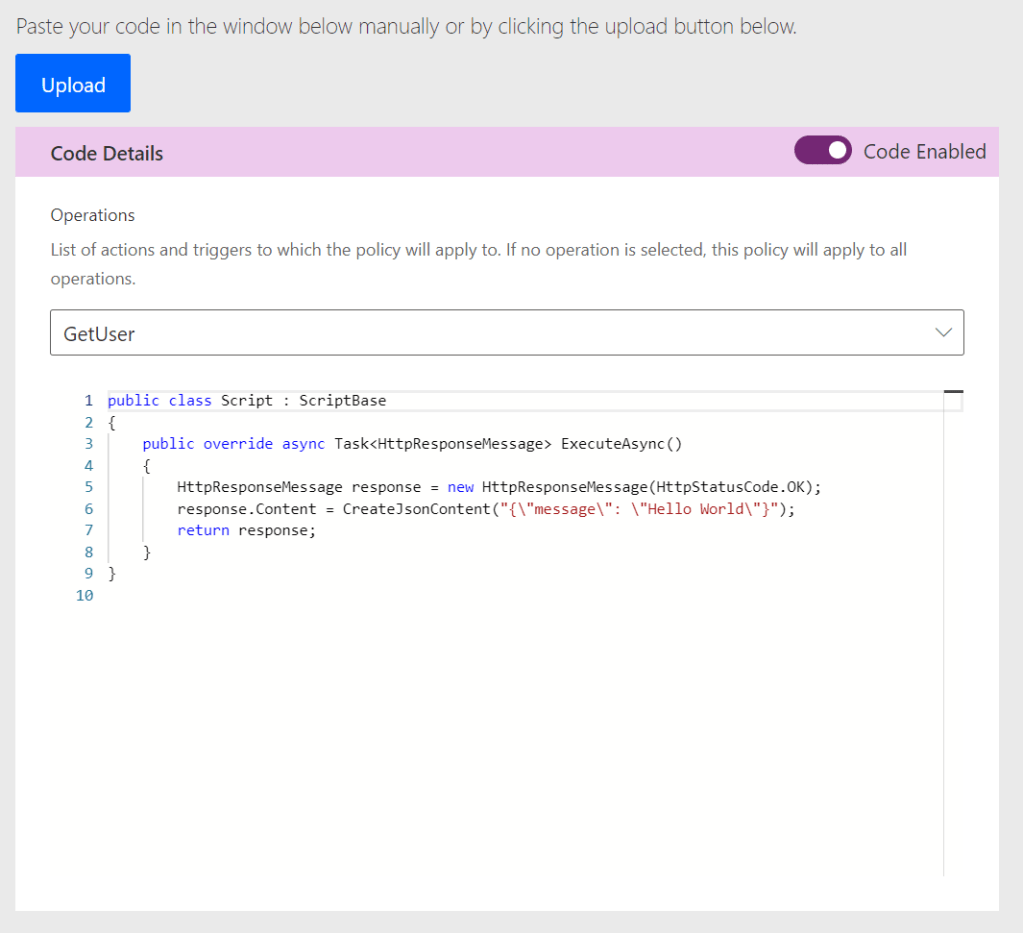
You can also define the specific operations on which this custom code will apply as below:

Recommendation: as there is actually no code debug available in the web interface (will be added in the future by Microsoft), I strongly recommend to debug and test your code locally before pasting or uploading it in the custom connector section.
After successfully created the custom connector with the sample code provided by default (Hello World) or a code sample of your choice, you are now ready to test it. If you enable the custom code, this code will have the priority over the codeless operations definition.
For this article, I’ve created a very simple Power Automate flow that is using my custom connector and display the result body to show you the override of the custom code:
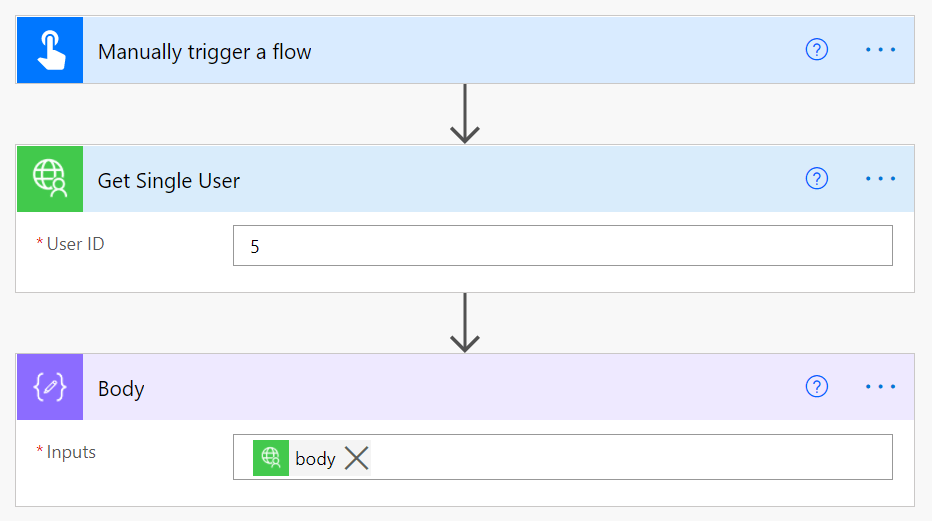
If I test this Power Automate flow, I’m getting the following body content as it’s the return value of the custom code provided in the related step:
{
    "message": "Hello World"
}
If you try to access return values from the codeless operations declared in the custom connector, the content will be null as the code has the priority!

It was a really quick overview of the custom code capabilities in Power Platform custom connectors but I’m really excited to explore more on this especially with some business cases with usage of other specific C# namespaces like Linq, Cryptography, Http and more! Stay tuned for an advanced article on this topic… and don’t forget to check the custom connectors GitHub repos there are some really good examples 😉
Happy coding everyone!
Resources
https://docs.microsoft.com/en-us/connectors/custom-connectors
https://docs.microsoft.com/en-us/connectors/custom-connectors/define-blank
https://docs.microsoft.com/en-us/connectors/custom-connectors/write-code
