
Context
With Adaptive Cards, you can easily share and display information without to be a designer and manipulate complex styles. Formatted in JSON, Adaptive Cards support multiple hosts like Microsoft Teams, Outlook, Bot Framework, Viva Connections Dashboard and more. In this article, I’ll show you an easy way to create, send and get responses from your end users in Microsoft Teams with Power Automate and Adaptive Cards so let’s go!
Building and sending Adaptive Cards
The easiest way to create your own Adaptive Cards when you have no idea about the structure and capabilities is to use the Adaptive Cards Designer from Microsoft. This useful web tool can generate Adaptive Cards from templates or from scratch and render the cards for the multiple hosts available. I recommend you to use this tool as much as possible when you’re starting.
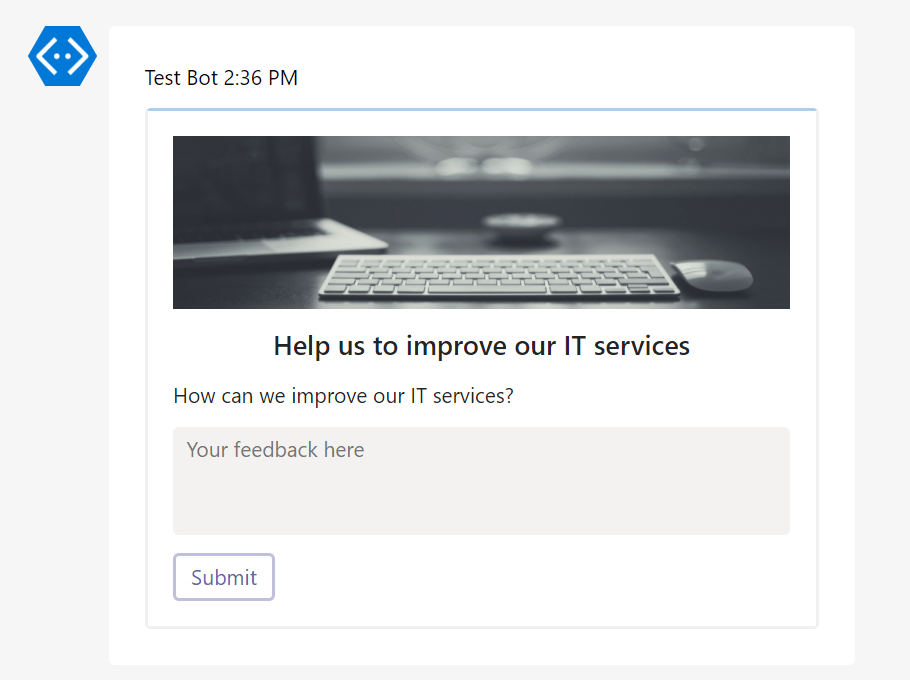
In my case, I’ll generate a simple feedback request Adaptive Card for Microsoft Teams host as below:
{
    "type": "AdaptiveCard",
    "$schema": "http://adaptivecards.io/schemas/adaptive-card.json",
    "version": "1.2",
    "body": [
        {
            "type": "Container",
            "items": [
                {
                    "type": "Image",
                    "url": "https://i.imgur.com/L0GbkSf.jpeg",
                    "id": "imgHeader",
                    "altText": "header",
                    "horizontalAlignment": "center"
                },
                {
                    "type": "TextBlock",
                    "wrap": true,
                    "text": "Help us to improve our IT services",
                    "horizontalAlignment": "Center",
                    "size": "Large",
                    "color": "Dark",
                    "id": "lblHeader",
                    "weight": "Bolder"
                },
                {
                    "type": "TextBlock",
                    "wrap": true,
                    "text": "How can we improve our IT services?",
                    "id": "lblQuestion"
                },
                {
                    "type": "Input.Text",
                    "placeholder": "Your feedback here",
                    "isMultiline": true,
                    "id": "txtFeedback"
                },
                {
                    "type": "ActionSet",
                    "actions": [
                        {
                            "type": "Action.Submit",
                            "id": "btnSubmit",
                            "style": "positive",
                            "title": "Submit"
                        }
                    ]
                }
            ]
        }
    ]
}
Note: the version of Adaptive Cards supported in each host can be different so be careful to use the right version number for your target host (1.2, 1.3, 1.4, etc.).

Now it’s done, you can create your Power Automate flow. For this article, I’m creating a simple instant cloud flow with manual trigger to show you the main logic behind but you can use any other available trigger for your business needs like SharePoint, SQL Server, ServiceNow, custom connector, etc.
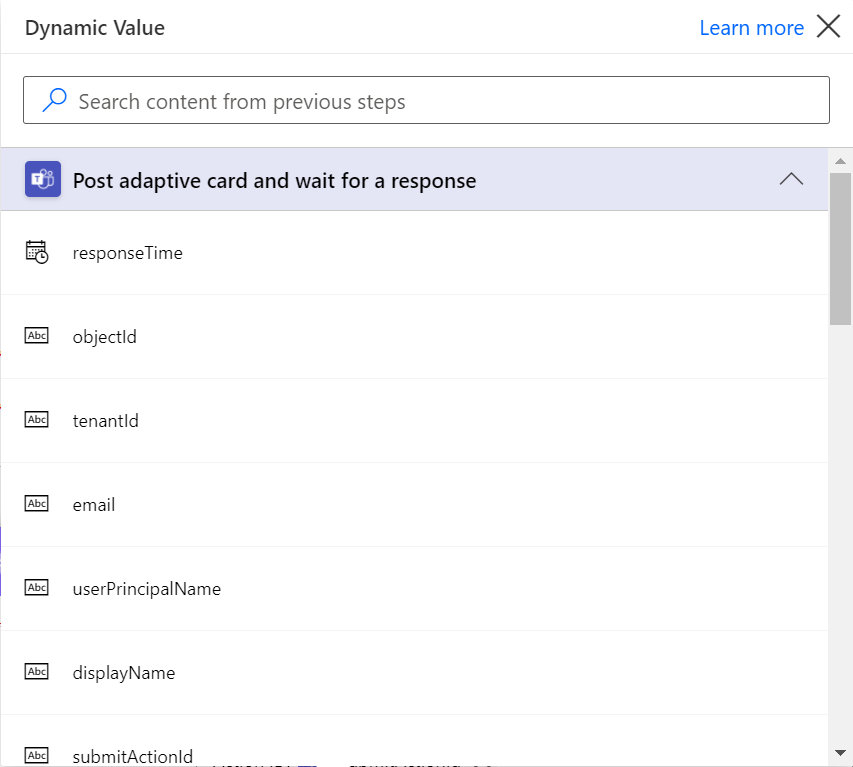
In the Power Automate flow, just add the action named “Post adaptive card and wait for a response” as below:

You need to fill the required fields of the action:
Post as: Flow bot
Post in: Chat with Flow bot
Message: Adaptive Card JSON code from the Designer
Update message: Thank you for your feedback!
Recipient: email address of the user to send the card (user@domain.com)
For this article, I’m also just adding a simple Compose action to format some fields from the user’s response but you can imagine a plenty of different scenarios where to store the response’s data like SharePoint, SQL Server, Excel, OneDrive, custom connector, etc.

And now it’s time to test the flow, in my case I’m just testing it in a manual mode:
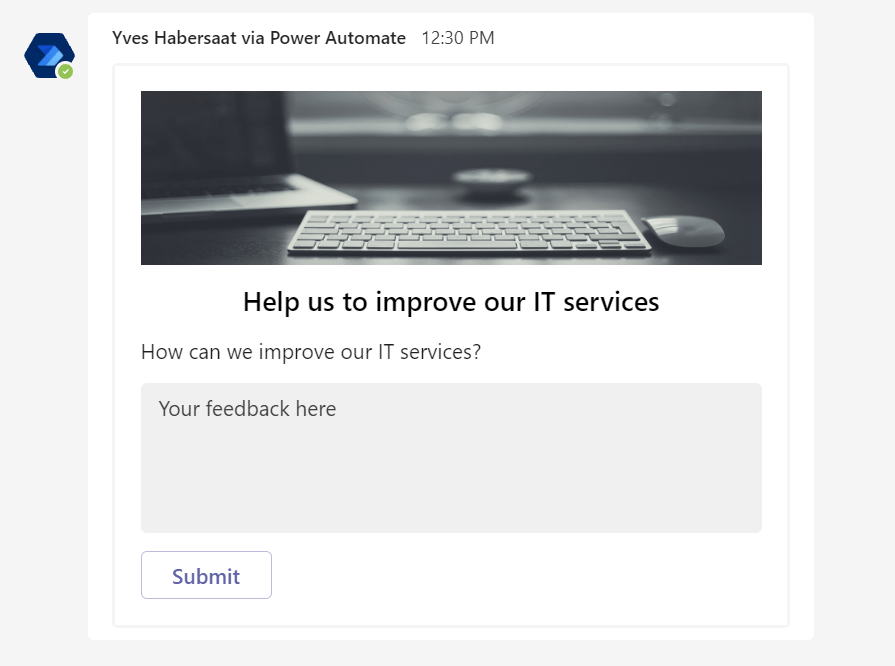
Fill the feedback text field and click on “Submit” button to continue the process:
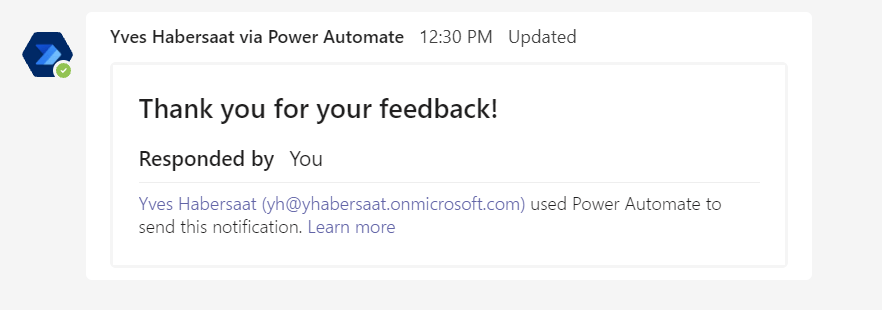
Finally, we can see that our Compose action displays all the selected fields from the response:
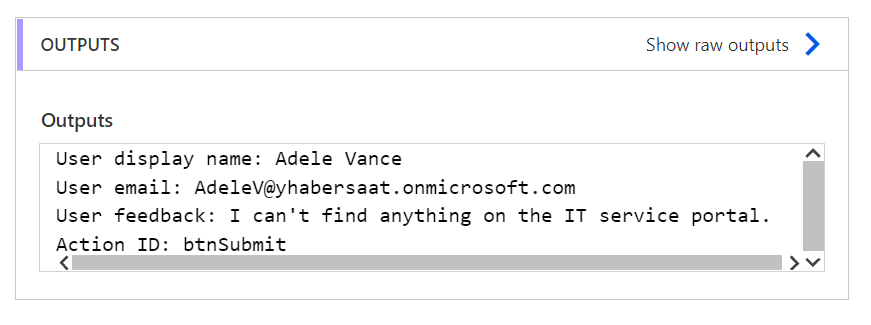
User display name: Adele Vance
User email: AdeleV@yhabersaat.onmicrosoft.com
User feedback: I can't find anything on the IT service portal.
Action ID: btnSubmit
I’m currently testing Adaptive Card Extensions (ACEs) with SharePoint Framework (SPFx) for Viva Connections Dashboard and I thought it was the good time to present you an other great low code/no code solution to deal with Adaptive Cards! I hope this article will be useful and don’t hesitate to contact me if you have any question or request regarding this article or want more technical details to implement this solution.
Happy coding everyone!
Resources
https://docs.microsoft.com/en-us/adaptive-cards
https://docs.microsoft.com/en-us/power-automate
https://docs.microsoft.com/en-us/microsoftteams/platform/task-modules-and-cards/what-are-cards

Did help me a lot!
Thanks Yves!
LikeLiked by 1 person
Thanks a lot for your feedback! Glad to see it helps.
LikeLike
Thank you for this how do i save the response to sql server , with the approver name and response
LikeLiked by 1 person
By using the SQL Server Premium connector in your flow: https://learn.microsoft.com/en-us/connectors/sql.
LikeLike
Thank you for your quick response.
LikeLiked by 1 person
Thanks for posting this – it nearly solves my problem!
I have been looking at how to generate proactive messages to users in teams based on rule based trigger. This works nicely, but there is no way to handle the responses in Copilot Studio – it seems that all business logic would need to be handled in Power Automate which is quite a limited experience.
I saw that you can now trigger the Copilot Agents and also pass in a conversationid but this doesnt appear to work for teams conversations (and there is close to zero examples of advanced configurations!).
Any thoughts or guidance here would be greatly appreciated.
Andrew
LikeLiked by 1 person
Thanks Andrew! The event trigger feature in Copilot Studio is actually in preview and will be improved in the future. Here is a link to the official documentation and it contains some basic examples: https://learn.microsoft.com/en-us/microsoft-copilot-studio/authoring-triggers-about. Actually, and based on my experience, you can invoke the Copilot Agent only with the triggers available at this point and pass any data to it. Based on the input he can do lots of things like sending Teams message to specific users or sending email notifications, but you need to declare all the actions that the Agent can use before.
LikeLike