
Context
Incoming Webhooks are Microsoft Teams special type of Connector which provide a great way to share content and send notifications in team channels from your external line of business applications. In this article, I’ll show you how to configure an Incoming Webhook in a team channel and use it to post an Adaptive Card when a new ServiceNow incident is assigned to this specific team. Let’s have a look at this deeper now!

Add an incoming webhook to a Teams channel
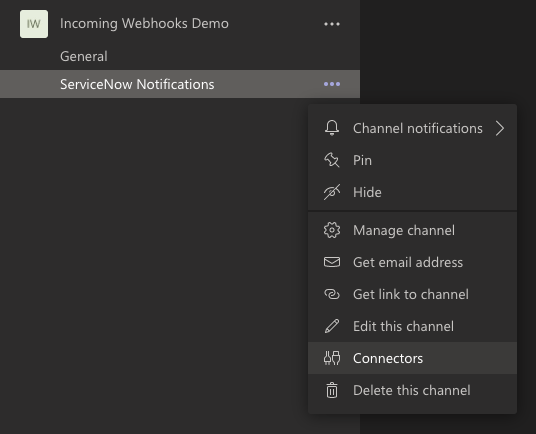
First, you need to add the Connector in the channel where you want to send the data (•••).
Then search for Incoming Webhook in the app catalog and add it.

Give it a name and upload a custom image if needed then click the Create button.
Finally, save the provided Incoming Webhook URL to your clipboard for later use.

Create the Adaptive Card object in the request
For this article, I build a simple custom Adaptive Card with some basic informations from a ServiceNow incident record and a View button to open it directly in your preferred browser.
Here is what it looks like in the team channel:

And here is my request body to display my custom Adaptive Card in the team channel:
{
    "type": "message",
    "attachments": [
        {
            "contentType": "application/vnd.microsoft.card.adaptive",
            "$schema": "http://adaptivecards.io/schemas/adaptive-card.json",
            "version": "1.2",
            "content": {
                "type": "AdaptiveCard",
                "body": [
                    {
                        "type": "TextBlock",
                        "size": "Medium",
                        "weight": "Bolder",
                        "text": "An incident has been assigned to this team",
                        "wrap": true
                    },
                    {
                        "type": "FactSet",
                        "facts": [
                            {
                                "title": "Number",
                                "value": "{{IncidentNumber}}"
                            },
                            {
                                "title": "Opened by",
                                "value": "{{IncidentOpenedBy}}"
                            },
                            {
                                "title": "Opened on",
                                "value": "{{IncidentOpenedOn}}"
                            },
                            {
                                "title": "Title",
                                "value": "{{IncidentTitle}}"
                            },
                            {
                                "title": "Description",
                                "value": "{{IncidentDescription}}"
                            }
                        ]
                    }
                ],
                "actions": [
                    {
                        "type": "Action.OpenUrl",
                        "title": "View",
                        "url": "{{IncidentURL}}"
                    }
                ]
            }
        }
    ]
}
Don’t forget to add the following header to your request:
Content-Type: application/jsonTo use Adaptive Cards with Incoming Webhooks you need to be carefull about the following points:
- The
"type"field must be"message". - The
"attachments"array contains a set of card objects. - The
"contentType"field must be set to adaptive card type. - The
"content"object is the card formatted in JSON.
When your request is ready, you can POST it to the Incoming Webhook URL saved earlier with Postman (for example) to test it and check the result displayed in the team channel.
Common use case
The common use case I chose for this article is to send notifications from a ServiceNow instance when an incident is assigned to a specific support team and can be applied for a ton of other scenarios like service requests, onboarding, offboarding, asset management, etc. You can do this easily inside your ServiceNow instance by creating a REST message to interact with the Incoming Webook then call it inside a Business Rule with specific conditions to trigger the notifications when you want.
To use my example with your ServiceNow instance, you’ll need to replace dynamically the following items (my Postman environment variables for debugging and testing) inside your Business Rule when calling your REST message by passing current incident record fields:
{{IncidentNumber}}: Incident number
{{IncidentOpenedBy}} : Incident caller
{{IncidentOpenedOn}} : Incident opened date
{{IncidentTitle}} : Incident title
{{IncidentDescription}} : Incident description
{{IncidentURL}} : Incident URL (service portal)
Hope this article will help you to understand better how to integrate your line of business apps with Microsoft Teams using Incoming Webhooks.
Happy coding everyone !
